Getting the pulk…

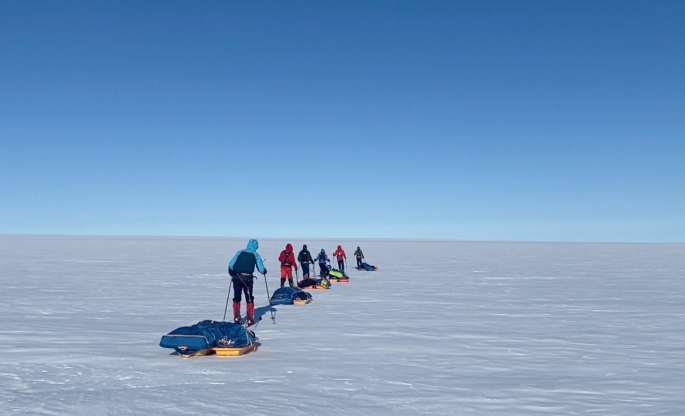
The pulk (the sled) is pretty important for the entire journey. I will be pulling all my food, tent and equipment, fuel and clothes it and at the start of the South Pole journey, it will weigh around 110kg or so. So it’s got to be pretty sturdy!

In Greenland, where we were pulling around 80kg or so, we used two Paris Pulks each. These are decent in that they are not very expensive, though as they are quite short, it was impossible to put everything onto just one of them. One of the big disadvantages of the Paris Pulks is that they are quite shallow and it is easy for them to become top-heavy and topple over to the side. You also have to have separate bags with all your gear and food that you secure on top of them with bungees or some other means. If you don’t pack your bag properly each morning, then you’ll be in for an annoying day having to go back and forth to the sled to turn it the right way up over and over again. Also, when the wind gets very strong, it can simply push the pulks over, and in Greenland we had to put the two pulks parallel with each other for a few days to stop that from happening.

Everyone on the Greenland expedition used Paris Pulks. You can see how say with the person at the back, the green bag that has the bedding is leaning over to the side. This happens a lot when you’re securing all the bags to the sled by the bungees, and it all affects the balance of the sled and how you move along.

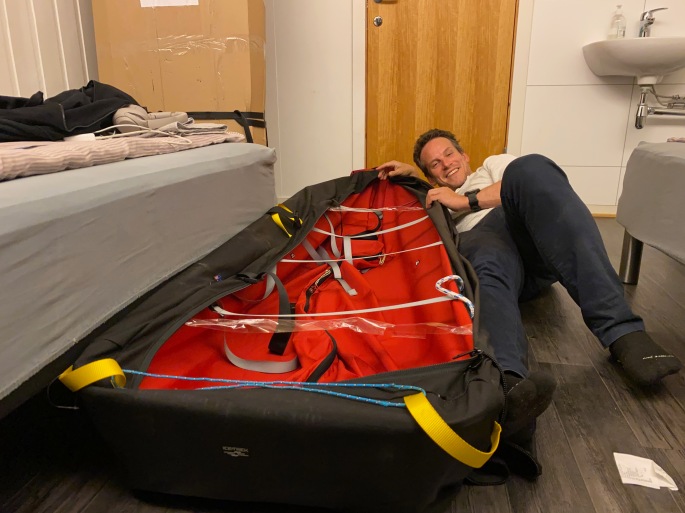
So for the South Pole journey, I have got myself a nice gigantic IceTrek Polyna sled. 210cm long, 68cm wide and 25cm deep (without the cover). Made by fantastically experienced polar explorer Eric Philips, they have a tremendous cargo volume and are designed to effectively float on soft snow and glide along nicely on the ice. Shouldn’t have any problems of overbalancing! I had arranged with Eric to pick the sled up in Svalbard (long story!)… quite an epic journey to get there and back… Inverness-London Luton–>London Heathrow-Oslo-Longyearbyen-Oslo-London Heathrow–>London Gatwick-Inverness… 6 planes, 6 different airports, 3 trains, 3 buses, 3 taxis, 2 days! Was kind of worried after collecting it that it might be too big for the airlines, and trying to cart it through the airport on the trolleys was pretty tricky given it’s length, but fortunately no real problems in the end! Tiring though.

Just a note: am (trying to!) raise funds for Cancer Research UK with these expeditions – please donate if you can, or share if you can’t!!! It would be amazing to have your support!

Polar diet and nutrition

There are so many details to think about with any polar expedition, and a lot of planning is required. One of the most important aspects is the diet. For the expedition to the South Pole, I will be burning around 7,000-8,000 calories a day and the body will need a massive amount of food and energy to make sure that it is able to cope. To manage, you have to have a substantial breakfast, then regular breaks during the day: in Greenland we would ski for 50 minutes and then take a 10 minute break to eat snacks and drink water. This would be over (on average) nine sessions a day, occasionally increasing to 10 or 11 sessions when needed to make extra distance. In the middle of all of that we would take a half hour break to have lunch. On previous expeditions, I have not had the lunches: I just had snacks every hour or 90 minutes… It was fine and both Natalia and I never felt fatigued doing that, but I felt in Greenland, having an actual lunch helped break up the day and gave an extra boost. Ultimately, you get into a routine, and need to find one that suits you and plan accordingly. You have to eat, as while you might feel good, your body demands it.

You can’t just eat energy bars and chocolate and you need variation, especially considering the endless routines being repeated over, in the case of the South Pole, around 45-50 days. It would be a good high energy breakfast such as porridge or granola. During the day, the snacks would consist of nuts, dried fruits, chocolate, granola and protein bars, cookies, a bit of meat and cheese (though smaller proportion as the body will need much more carbs than protein). This all has to be carefully weighed out for every single day, so you have your snack bags for each day ready to pack up. Then a nice dehydrated meal in the evening when camping. You can also add butter to the meals and breakfast for the extra calories and fats, and energy drinks and protein recovery drinks will also help.

I have tried various brands and types of camping foods on my different expeditions, and it really is important to have food that you like and a good range of flavours to have the variation. You don’t want to be dreading your evening meal or your breakfasts, and variation to the daily snacks also helps to enjoy everything, so you can add little treats into your bag. You want to plan out each week to know what you will eat, and have everything in the weekly stuff sacks. For South Pole, I will have stuff sacks for every 10 days… which week days won’t really mean anything down there!

My favourite dehydrated food over the different journeys I have been on has been the meals made by Expedition Foods. They really do make a great range of different meals (Fish and potato with parsley sauce, and their spaghetti bolognese are among my favourites, but there are many others!) and I was really delighted when they agreed to support the coming South Pole journey. 50x 1,000kcal evening meals, 50x 450kcal lunches, 11x 1,000kcal breakfasts (I have a standard maple syrup flavour porridge that I came to love in Canada!)–the Expedition Foods breakfasts will make a really nice treat between the standard ones!–and 10x 450kcal dessert… again, to make for occasional treats to help the motivation and enjoyment.

Boots made for walking…

After the rather exhausting “warm-up” hike around Beinn Ghlas, we all got up to Aviemore, with the plan to spend the Sunday going up another couple of Munros. I was just too tired though so while my sister and her boyfriend Dave did just that, I spent the day in Aviemore.

It was a good job I did as I realised the soles were falling off my over-worn boots, and they probably would not have lasted much longer. It took me half a day, but I managed to find a place that sold my size of Salomon 4 GTX walking boots so I could then spend the next half a day on a more gentle hike up one of the hills around town (and practicing with my new drone! :D).

New boots! 😀

On that subject, if anyone is looking for new walking boots, these boots from Salomon are super good. I was worried about blisters and breaking them in considering I planned on starting a journey through the Cairngorms on the Monday. But no, no problems at all. Very comfortable, didn’t take long to get used to, waterproof and… no real blisters over the next 100km of hiking. Been using them ever since with walks along muddy river trails and they are wonderful.

And the hike up above Aviemore was just a perfect way to get into them and prepare for the week ahead.

Boots ‘n Bindings

Getting boots for polar expeditions is not entirely simple – you have to consider the warmth of the boots of course, but you also have to consider the bindings that will let you attach to the skis.

On the Auyuittuq and Cross Canada journeys, Natalia and I used the Baffin Boots – Polar Series (Impact); rated down to -100C, with removable liners. They are harder to get a hold of in Europe as opposed to Canada or the US, but are excellent. They are pretty big boots (and you need to get at least one size larger than your normal size as you have to think about the number of socks you’ll wear), but… they’re not compatible with any standard ski bindings. Instead, you have to get specialised bindings that can be used with large boots, and we found that the famous Australian explorer Erik Phillips designed and sells “Flexi bindings” for this purpose. Erik skied from the Siberian coast to the North Pole using these. The bindings are very simple–after you have installed them on the skis at least: you just slot in your boots and then tighten the straps. And they are also very easy to remove when you want to take your skis off. Sometimes when we were skiing the straps did become a little lose, and when the straps got wet, this would make them harder to tighten, but on the whole, we were very happy with them. They are pretty much indestructible, though only problem is that they are expensive, and you have to import them from Australia.

As a note, you can now get Baffin polar boots that are compatible with three-pin bindings, but I can’t comment about what these are like, aside from their being twice the cost of the standard polar series. Probably worth investing in Alfas…

With the Greenland Expedition, I will be with a team led by Hvitserk of Norway, and for the sake of making repairs easy with a group of ten of us, they have requested that we use BC bindings, which are much cheaper than the Eric Phillips bindings. Okay… the only problem is that while obviously normal ski boots can be used with such bindings, normal ski boots aren’t designed for polar expeditions and are way too tight and cold. You need to get Alfa Polar Expedition boots, which are… darn expensive (eliminating any savings from the bindings!). The good thing about the Alfas is that they are very warm and again have the removable liners that are also vapour barriers that prevent the inner boot getting wet from sweat; they are also considered the best expedition boots out there. And after having skied with them a week in Norway… well yes, they are really very comfortable. It takes a little while to get used to the BC binding system as opposed to the Flexi bindings – you have to place the bar at the front the of the Alfa boot in the lock on the bindings, so have to make sure it’s in the right position and it can take a little practice. Also, snow can get in behind the binding lock making it hard to open or close properly without removing it, so it can be fiddly. But overall, it seems more comfortable and solid skiing and moving with the Alfas than the Baffins, so I am (at least, I think I am) happy with the change! Again, let’s see after Greenland!

The right skis

There are two main brands of skis that are used for polar expeditions – Fischer E99s and 109s (a number variations over the years), or several types of Asnes skis, such as the Amundsen, Nansen and Ingstad cross country skis. They have slightly different widths, so weight distribution differs a little, but they all have steel edges, making them more durable and robust in the polar conditions, easier to cut through icier and harder snow. The newer versions have slots to lock in half skins, which is very handy to have when you know you’ll be doing climbing, but can easily take them off; though Fischers can come with waxless grips so you don’t need to put skins on.

For the Cross Canada expedition, together with the Auyuittuq Traverse, I used the E109s, which were great, and they had waxless grips so were pretty decent when climbing up. Natalia had the E99s, and were neither waxless nor had slots for the skins, so we screwed the half skins on… while they do have glue to stick onto the bottom of the skis, when temperatures get down to -40C and below, the glue is not so effective and the skins are liable to come off. It felt terrible screwing into the body of the skis, but it worked.

There was one tough day when on the way to Churchill during Cross Canada, despite the extreme cold, when we were going over a small river, the ice broke a bit and our skis went into the water. The water then froze on to the skis (and the skins), together with a load of snow, and it was a real hassle getting it all off, so it took a while before we were able to ski properly again. Though I think we would have had this problem regardless of what skis we were using!

Now for Greenland I have got the Asnes Amundsen skis, which I tested for the first time in Norway. It was a joy being able to just slot in the skins – so easy! And climbing in them (using mohair skins) felt pretty comfortable and I never really had any problems. But I don’t know… I miss the E109s… maybe because they were the skis I learned to (cross-country) ski with, and I spent so long on them with the previous journeys; maybe because I felt more confident with them being slightly wider… I guess I’ll only be able to judge properly in the course of Greenland.

A good comparison between two of the main types (E109 Crown Extralite v the Asnes Nansens) is on the Telemark Talk ski website – pretty interesting and worth checking out!

Thinking about the gear

So much gear to think about and to get for journeys like these… got to get the right skis and bindings; polar boots that are compatible with the bindings… base layers, mid layers, outer shells and down layers (both for legs and top); sleeping bags and vapour barrier liners, liner gloves and mittens and then the bigger mitts. Light hats; heavier hats; googles and sun glasses; face masks, balaclavas… water bottles and thermos flasks… That’s not mentioning the tent and the stoves, and communications devices (locator beacon and sat phone), solar panels and spare batteries… the list just goes on and on!

All of it has to get into the sled, together with the bags full of the food and snacks that have to be prepared in advance, and the gasoline to cook with and melt water every morning and every night as the expedition proceeds…